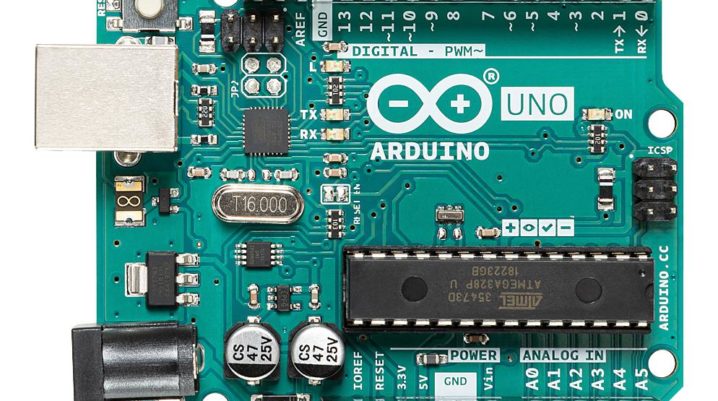
The HC-SR04 ultrasonic sensor is a popular and cost-effective solution for measuring distance in DIY projects using Arduino. This comprehensive tutorial will guide you through connecting and using the HC-SR04 sensor with an Arduino board, providing sample codes, detailed explanations, and illustrations. By the end of this tutorial, you’ll have a thorough understanding of the HC-SR04 and how to integrate it into your projects.
Components Needed:
- Arduino Board (Uno, Mega, or any other compatible board)
- HC-SR04 Ultrasonic Sensor
- Breadboard
- Jumper Wires
- 1kΩ and 2kΩ resistors (optional, for voltage divider)
Connect the components as follows:
- VCC (HC-SR04) -> 5V (Arduino)
- GND (HC-SR04) -> GND (Arduino)
- Trig (HC-SR04) -> Digital Pin 9 (Arduino)
- Echo (HC-SR04) -> Digital Pin 10 (Arduino) *consider using a voltage divider if using a 3.3V Arduino board
*Note: If you are using a 3.3V Arduino board, it is recommended to use a voltage divider with 1kΩ and 2kΩ resistors for the Echo pin to avoid potential damage to the Arduino. Connect the 1kΩ resistor between the Echo pin on the HC-SR04 and the breadboard, then connect the 2kΩ resistor between the breadboard and the Digital Pin 10 on the Arduino. Finally, connect a GND wire from the breadboard to the Arduino’s GND.
How the HC-SR04 Sensor Works:
The HC-SR04 ultrasonic sensor measures distance by emitting an ultrasonic sound wave and measuring the time it takes for the sound to bounce off an object and return to the sensor. The speed of sound in air is approximately 343 meters per second. Using this information, we can calculate the distance to the object by measuring the time it takes for the sound wave to travel to the object and back.
Arduino Code:
// // Define pins for the HC-SR04 sensor
const int trigPin = 9;
const int echoPin = 10;

// Define variables for distance measurement
long duration;
float distance;

void setup() {
  // Initialize serial communication
  Serial.begin(9600);

  // Set up HC-SR04 pins
  pinMode(trigPin, OUTPUT);
  pinMode(echoPin, INPUT);
}

void loop() {
  // Trigger the HC-SR04 sensor
  digitalWrite(trigPin, LOW);
  delayMicroseconds(2);
  digitalWrite(trigPin, HIGH);
  delayMicroseconds(10);
  digitalWrite(trigPin, LOW);

  // Read the echo pin and calculate duration
  duration = pulseIn(echoPin, HIGH);

  // Calculate distance (in cm)
  distance = (duration * 0.0344) / 2;

  // Output the distance to the serial monitor
  Serial.print("Distance: ");
  Serial.print(distance);
  Serial.println(" cm");

  // Wait before taking another measurement
  delay(500);
}
Upload the code to your Arduino board, and open the Serial Monitor. You should see the distance measurements displayed in centimeters.
Understanding the Code:
- We define the pins connected to the HC-SR04 sensor (trigPin and echoPin) and variables for measuring the duration and distance (duration and distance).
- In the setup() function, we initialize serial communication and set up the HC-SR04 pins as inputs and outputs.
- In the loop() function, we trigger the sensor by sending a short pulse to the trigPin, then read the echoPin to measure the duration of the returning sound wave.
- We calculate the distance using the formula: distance = (duration * 0.0344) / 2. The factor 0.0344 converts the time to centimeters, and we divide by 2 because the sound wave travels to the object and back.
- We output the distance to the Serial Monitor and wait for 500 milliseconds before taking another measurement.
Advanced Usage Tips:
- To increase measurement accuracy, consider taking multiple readings and calculating the average distance.
- To measure larger distances, increase the delay between measurements, and adjust the timeout parameter of pulseIn() accordingly.
- For a more responsive system, consider using interrupts instead of polling the echoPin.
- To measure distances in different units (e.g., inches), adjust the conversion factor in the distance calculation formula.
Conclusion:
This in-depth tutorial has provided a comprehensive guide on using the HC-SR04 ultrasonic sensor with Arduino, complete with wiring instructions, detailed explanations, and illustrations. By following the steps outlined in this guide, you’ll have a solid understanding of how the HC-SR04 works and how to implement it in your projects, even if you’re new to the subject.
